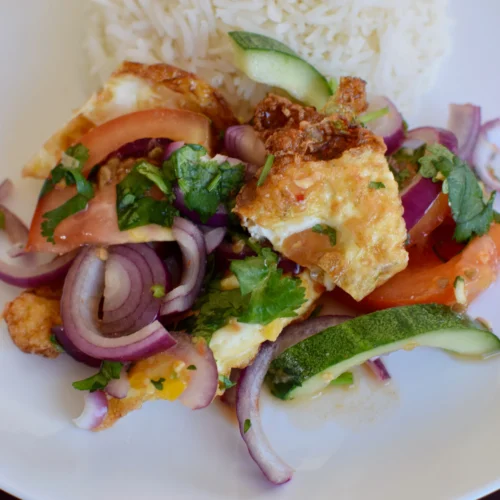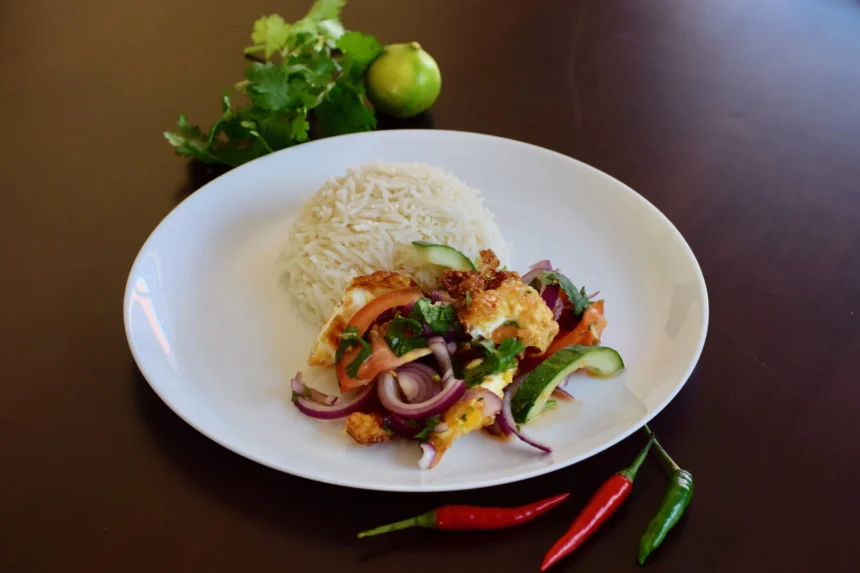
Yum kai dao (roughly translated to ‘fried egg spicy salad) is a perfect example of that rare type of recipe which combines everyday ingredients into a magical dish far more than the sum of its parts.
We have eaten a lot of great food in Thailand over the years, however Yum kai dao has always stood out from the pack for me because of its fresh and punchy tastes.
This recipe comes from a working Thai kitchen in Khao Sok, and so will get you pretty close to recreating a plate of yum kai dao that would be typically eaten as part of an everyday home Thai meal.
It is also easy to recreate at home – I’ve been making it for the past 5 years!
Article Contents:
- Where is this recipe from?
- What should it taste like?
- What can I serve it with?
- Key Concept 1 – Thai style fried eggs
- Key Concept 2 – mastering the sauce
- Ingredient and Cooking Notes
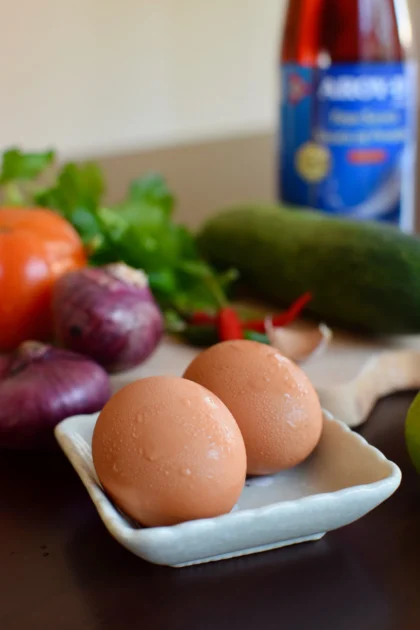
Who would have thought! The humble egg can be the base for a mouth-watering Thai salad.
Where is this yum kai dao Recipe from?
Yum kai dao does not often appear on restaurant menus in Thailand. However, it is a classic Thai salad that any Thai cook worth their salt will be able to cook at home.
I have based this on the recipe I was taught in the kitchens of Silver Cliff Resort in Khao Sok.
The chefs Gai and Jan have been cooking Thai food all their lives and serve a range of authentic dishes, both restaurant classics and home-cooking favourites including stir-fried pumpkin with egg (pad fak tong) and Isaan-style larb moo.
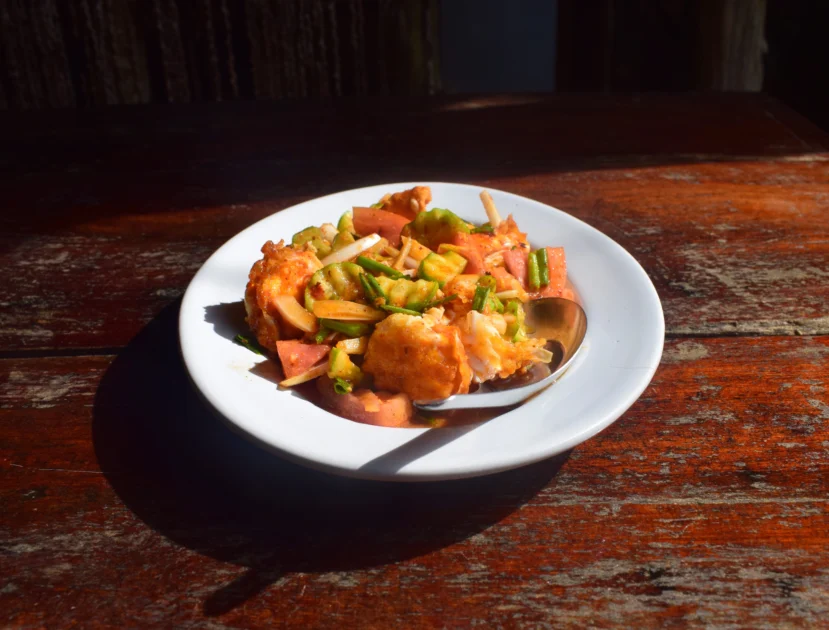
The original yum kai dao I was taught and served at Silvercliff Resort in Khao Sok. The key difference between this version and the recipe in this article is use of Thai chilli jam (see ingredient notes).
What should the final yum kai dao taste like?
Heere’s what to aim for…
The fresh base is composed of crunchy cucumber, fresh tomato and raw onion (making it reminiscent of the middle-Eastern salad fattoush), but with the predominant herb ‘Chinese celery’ giving an aromatic celery flavour.
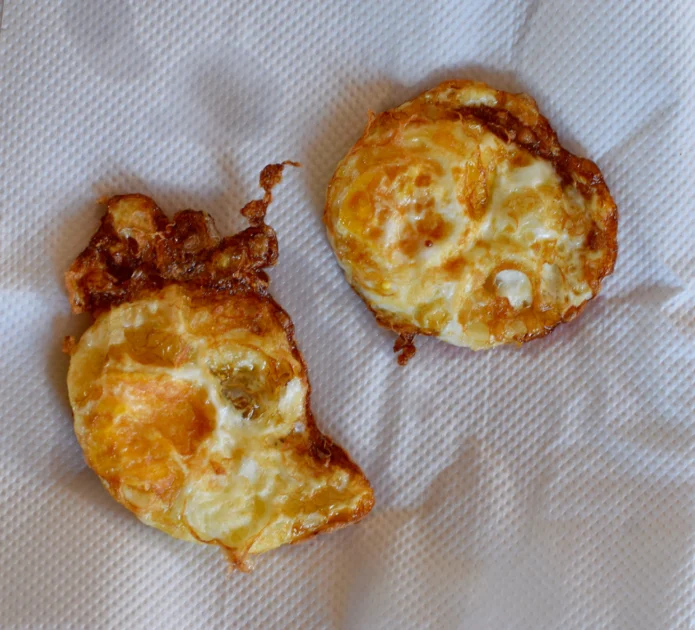
Rich and crispy pieces of Thai-style fried egg are then added to beautifully contrast this fresh base. These eggs have been fried ‘Thai-style’ (essentially deep fried in hot oil), a cooking technique which gives crispy-edged bubbly whites.
Finally, the whole lot is tossed in a quintessential Thai dressing which, in classic Thai fashion, explodes on the taste buds with contrasting tastes. Sugar, lime, fish sauce and chilli are blended to balance the 4 most important important tastes of Thai cuisine: sweet, sour, salty and spicy.
The result is a refreshing, textured, aromatic and incredibly moreish dish. If you get the balance of the dressing right, I guarantee you won’t be able to stop coming back for more, even if your mouth is on fire!
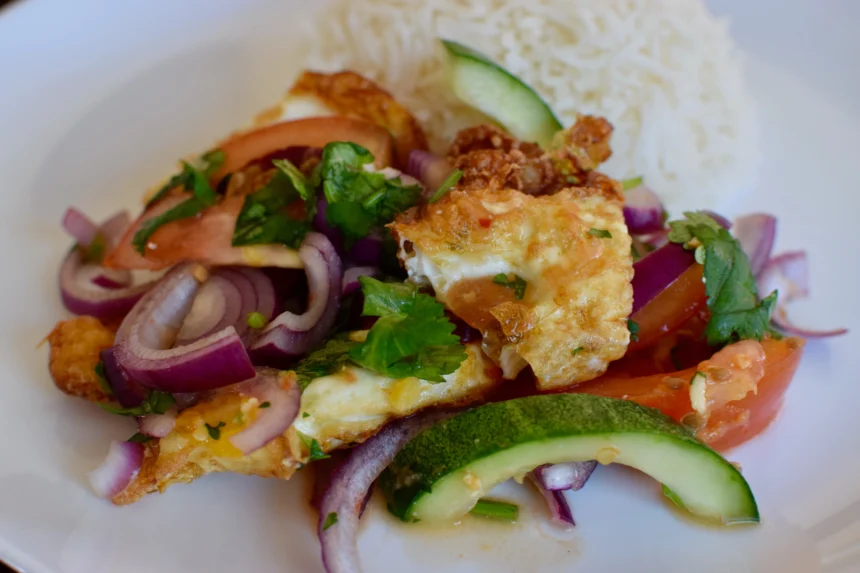
Like a typical Thai ‘yum’ (or sour/spicy salad), the sweet, sour salty and spicy dressing will keep you coming back for more.
What can I serve yum kai dao with?
Yum kai dao can be served simply with plain rice. I have found it’s a great way to spice up your midweek meal regime (try this on a Monday evening when you are at your lowest, I promise it will cheer you up!).
However, yum kai dao is commonly served alongside other dishes as part of a larger Thai meal. I really like making a couple of fresh and punchy salads including yum kai dao alongside richer dishes, such as a coconut-based Thai curry. Just place it all in the middle of the table with some white rice and let the diners hop back and forth between the contrasting dishes for a very satisfying meal.
Some richer Thai dishes that I think complement particularly well:
- Gaeng pet – Thai red curry
- Gaeng panang – a richer version of a red curry incorporating peanuts into the paste
- Pad fak tong – another Thai dish typically cooked at home containing pleasantly rich stir-fried pumpkin and egg
Key Concept 1 – Thai style fried eggs
This will be a new technique for most people less familiar with Thai cooking. It’s certainly not your normal sunny-side-up fried egg.
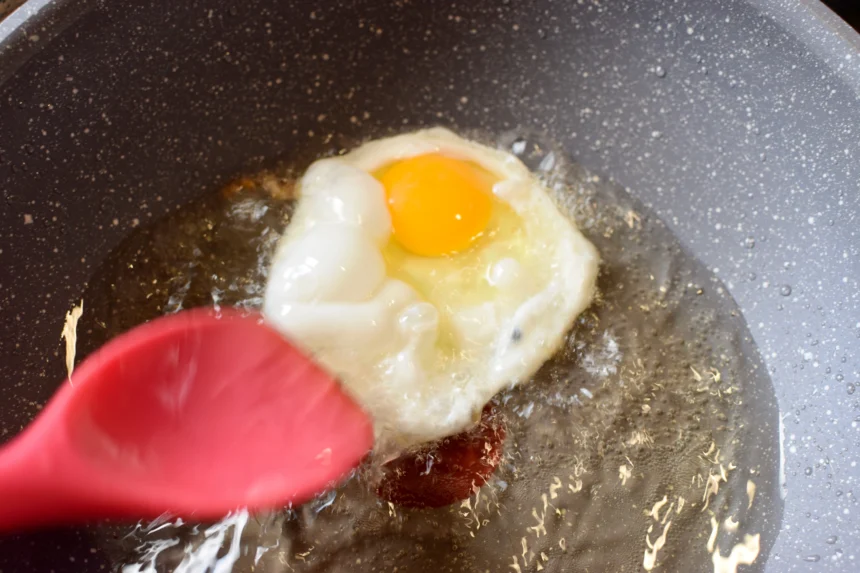
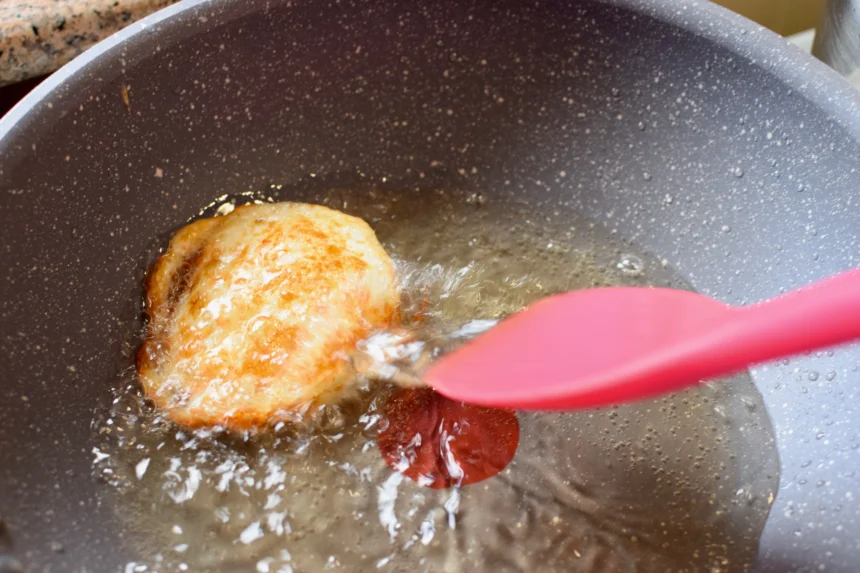
The technique is essentially deep-frying the egg in hot oil. The aggressive heat surrounding the egg makes the water within the egg quickly evaporate and bubble up through the already-setting white, meaning that the resulting egg whites take on a more ‘bubbly’ appearance surrounding the yolk. Importantly, the hot oil also works its magic on the edges of the white, turning them crispy and golden brown.
Your yolks don’t have to be runny for yum kai dao (in fact the yolks have been fully set each time I have eaten this dish in Thailand). If you’re lucky you may find the yolk may not be completely set by the time your white is crispy, but it doesn’t make a difference to the salad if not
It’s a very different aim compared to a classic ‘western-style’ fried egg, where a runny yolk is goal (at least for me). However, the whites provide a crunchy (almost chewy) texture that contrasts the rest of the salad and holds onto the dressing better.
For this reason I strongly recommend giving this new technique a go for this salad. Don’t be tempted to go down the ‘healthier route’ of a normal fried egg – once you know what you’re doing it’s not much more difficult!

My final eggs – crispy whites that provide texture and grab hold of that delicious dressing
Key Concept 2 – mastering the sauce
As with many Thai classics, the most important bit of the whole dish is achieving the correct balance of tastes in the sauce.
The dish I was taught in Khao Sok was predominantly sour and sweet from lime juice and sugar respecitvely, with a generous saltiness from the fish sauce and a decent kick of heat from the dried chilli. I really liked the balance that Gai and Jan serve in Silver Cliff, and this is reflected in the quantities I have described in the recipe.
However, ultimately this balance is subjective and the most important thing is that you taste the sauce and adjust until you love it before serving . I would suggest starting with my quantities and going from there!

As with most thai salads, adjust, taste, adjust, taste…
Ingredient Notes
- Dried chilli vs fresh chilli – the original recipe I was taught used dried chilli as opposed to fresh. Having tried both versions I personally prefer the sharper heat of fresh alongside the fresh ingredients of the yum kai dao (as opposed to the duller and warming heat of dried chilli).
- Peanuts – another common ingredient that can be added to yum kai dao. If you add them, I recommend toasting them first in a dry pan to bring out their flavour.
- Celery leaf vs coriander vs chive leaf – the most common herb in yum kai daos I ate in Thailand was Chinese celery – a soft herb with a flavour just like celery. It’s delicious and would be my herb of choice for this recipe, but there’s no harm in exchanging it for other more readily-available soft herbs. I have used coriander in this recipe, but the version I learned in Khao Sok used chive leaf or spring onion. It’s flexible at the end of the day: you just want something with a fragrant flavour to brighten the salad mix.
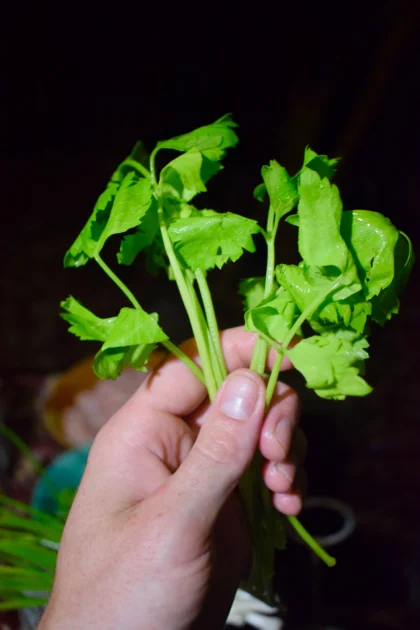
‘Chinese celery’ (pictured here) tends to be the herb of choice for yum kai dao in Thailand, but you can exchange for more common alternatives.
- Thai chilli paste – In the recipe I learned in Khao Sok, a couple of teaspoons of Thai chilli paste was added to the sauce. This is a sweet, spicy and rich paste made from chilli and fermented shrimp in addition to a lot of other ingredients. It does add an extra depth and a beautiful red colour to the final yum kai dao. However the other ingredients of the dressing are sufficient to hit the sweet, sour, salty and spicy tastes required for a good yum kai dao. I therefore am happy to suggest it as optional, simply because I know it is a bit harder to get and I don’t think it should be a barrier to anyone from trying yum kai dao.

Thai chilli paste is an optional addition to yum kai dao. Any good Thai shop or online store will sell it, and it is a great addition to many other Thai salads and stir-fries. Therefore I recommend any keen cooks try a jar for themselves. The brand I saw across Thailand is Maepranom Brand.
Cooking Notes
- Don’t over-mix the eggs -add these as your final step, giving only a light mix once they are in. Otherwise the yolks can crumble and make the yum kai dao look less appealing.
- Making Ahead – I often make this dish ahead as one part of many dishes in a Thai meal. In any case the eggs are served lukewarm at best when you eat yum kai dao in Thailand. However do not toss the main salad with the dressing and add the egg until the last minute, because the veg can begin to pickle and soften in the dressing, losing their all-important crunch.
Yum Kai Dao – a homestyle Thai fried egg salad recipe
Ingredients
For the Base Salad
- 250 g Cucumber watery core removed with a teaspoon, then sliced into 4cm-long segments
- 1 Big tomato sliced into 4cm-long segments
- 1 White or red onion sliced into 4cm-long segments
- 1 small handful Celery leaf roughly chopped. Can also use coriander leaf – see
ingredient notes
For the Dressing
- 2 tbsp Fish sauce
- 1-2 Limes juiced
- Half tsp White granulated sugar
- 1 Clove of garlic
- 3 Thai birdseye chillies
- Salt to taste
For the Fried Eggs
- 2 Eggs
- Neutral cooking oil suitable for deep frying (e.g. sunflower oil)
Instructions
Salad and Dressing Prep
- Prepare the base salad ingredients and mix in a non-reactive bowl.
- Prepare your dressing. In a pestle and mortar, bash the garlic and chilli into a fine paste (adding the sugar will help by creating friction). Add your remaining dressing ingredients. Taste and adjust until you love it – it should be predominantly sour and sweet with a background saltiness to balance. Remember, it should be powerful at this stage (particularly from the chilli and garlic) as it will be diluted once mixed with the remaining ingredients.
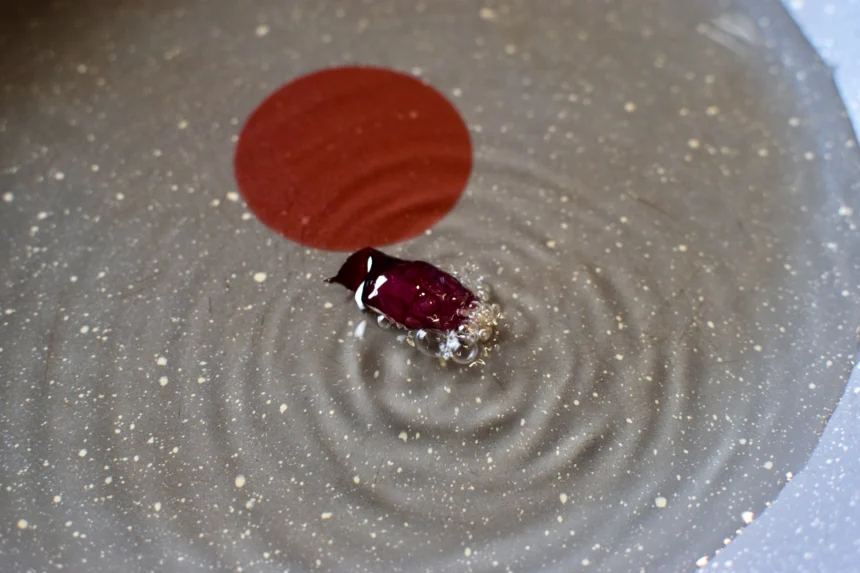
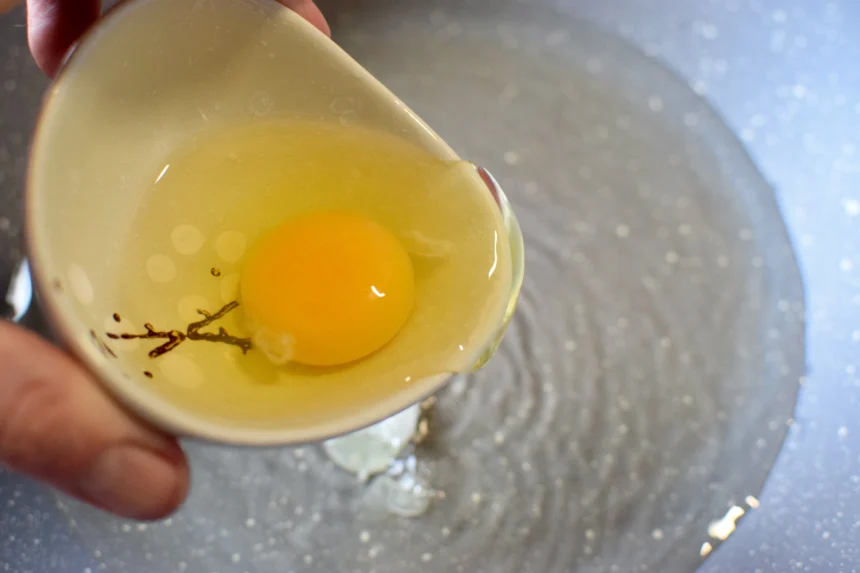
Frying the Eggs (see article for pictures )
- To fry your eggs, fill the bottom of the wok or frying pan with vegetable oil until there is enough to make an egg float. Heat the oil until hot enough to fry (test with a small piece of onion, which should bubble fiercely when dropped in).
- Break an egg into a small dish, then tip into the hot oil and fry for around one minute. Gently spoon oil over the top to help it cook evenly. Turn the egg over and fry for around 30 seconds more, continuing to spoon hot oil over the top. After flipping, the top side of the eggs should be nicely browned and crispy. Once the egg is finished (you are looking for an even golden brown appearance all around), transfer to a plate lined with kitchen paper to drain.
- Repeat until all your eggs are cooked (you can cook 2 eggs simultaneously once you are confident but I’d advise not more than this – the wok will become crowded and the eggs will end up boiling rather than deep frying, which will prevent you from getting a nice crispy texture).
Final Steps
- Once cool enought to handle, slice the eggs into bite-size pieces.
- Before serving, add the dressing to the salad and toss. Give it a final taste and adjust by adding more fish sauce/sugar/lime if necessary. Finally, add your egg pieces and give one final light toss.
- Serve alongside plain white rice or as part of a spread of dishes.
